By the FaultToFix team | Published: 31 October 2026 | Last updated: 31 October 2026
DIY level: Easy · Cost: £0 for the checks; £2–£10 if screws or a plane are needed · Time: 15 minutes to diagnose; 30–90 minutes if trimming is genuinely needed
Quick Answer: A door that keeps sticking usually has not grown — it has dropped. The top hinge carries most of a door’s weight, and when its screws work loose or strip their holes, the door tips forward by a millimetre or two and catches at the top corner or along the latch side. Tightening the hinge screws — and repairing a stripped hole with a longer screw or the matchstick-and-glue fix — cures most sticking doors in minutes, for nothing. Only trim the door as a last resort, after the hinge check and the even-gap check, and never trim a fire door at all.
Key Takeaways
- Hinges first, always: a loose top hinge drops the whole door, and trimming a dropped door just makes it loose once the hinge is fixed.
- The even-gap check tells you where it sticks and why: uneven gaps point at the hinge; a gap tight everywhere points at swelling.
- A spinning screw is a stripped hole, not a tight one: repair it with a longer screw into the frame, or fill and re-drill — never just force it harder.
- Seasonal sticking is swelling: a door that sticks in damp months and frees up in dry ones should usually be left alone, or trimmed by the smallest possible amount.
- Trimming is irreversible and last: plane a little, re-hang, test, repeat — and never plane, trim, or alter a fire door in any way.
Jump to a Section
- Confirm the diagnosis · Symptom → cause table · You need · The hinge-screw check, step by step · Repairing a stripped screw hole · The even-gap check · Seasonal swelling · Trimming, the last resort · Common mistakes · If that didn’t fix it · When to stop and call a professional · Cost table · US / UK term box · FAQs · Checklist
Safety box
Fire doors are never DIY-modified. If the sticking door is a fire door — thicker than a standard door (about 44 mm / 1¾ in), usually with a self-closer, intumescent strips in the frame or door edge, and often a sign or a plug/label on the edge — do not plane it, trim it, remove the closer, or change its seals. An altered fire door may not protect anyone in a fire. A sticking fire door is a job for a competent fire-door professional, full stop. Also: never force a stuck door open with your shoulder or foot — a door that suddenly gives can throw you off balance or tear its hinges out. And support the door’s weight properly (a helper, or wedges under the door) before you remove any hinge screw completely, so the door does not drop on the remaining hinges.
First, confirm the diagnosis (two free checks)
Check 1 — where does it stick? Close the door slowly and watch where it first touches: top corner on the latch side, along the latch-side edge, at the bottom, or all along one side. If it is painted, look for the shiny, rubbed patch on the door edge or frame where the paint has worn — that rubbed patch is the sticking point, and it tells you which cause to suspect.
Check 2 — does it stick all year, or only in damp weather? A door that started sticking after a wet spell, and frees up when the weather dries, is swelling — timber and timber-based doors take on moisture and expand slightly. A door that sticks all year round, or that started suddenly, is far more likely to have dropped on its hinges.
- Sticks at the top corner (latch side), gap tight there and wide at the bottom: the door has dropped on its hinges — start with the hinge-screw check.
- Sticks along the latch-side edge, worse in damp months: swelling, or a dropped door — do the hinge check first anyway, because it is free.
- Sticks at the bottom and drags on the floor or carpet: the door has dropped a long way, the bottom hinge is loose, or a new thicker carpet or flooring has raised the floor — check hinges, then the flooring change.
- Sticks all along one side, every season: the frame may have shifted or the door has swollen unevenly — hinge check first, then read the “if that didn’t fix it” section before trimming anything.
That order matters: the hinge check costs nothing and takes five minutes, and it fixes the majority of sticking doors. Trimming is the only fix in this guide you cannot undo, which is why it comes last.
Symptom → cause table
| What you notice | Most likely cause | First check |
|---|---|---|
| Sticks at the top corner, latch side; gap wide at bottom corner | Dropped on the top hinge — screws loose or stripped | Hinge-screw check, top hinge first |
| Screw turns but never tightens | Stripped screw hole — the screw has no grip | Longer screw, or matchstick-and-glue repair |
| Sticks along the latch edge in damp months, free in summer | Seasonal swelling — door has taken on moisture | Even-gap check; usually leave it, or a minimal trim |
| Drags on the floor or new carpet | Dropped door or raised flooring | Bottom hinge screws; was flooring changed recently? |
| Sticks all down the hinge side | Hinge side binding — hinge knuckles worn, screws proud, or paint build-up | Screws sitting flush? Paint ridges in the hinge recesses? |
| Sticks everywhere, all year, and the gap is uneven in two directions | Frame shifted or door warped | Even-gap check in two directions; see professional section |
| Door is thick, has a closer and seals in the frame | It is a fire door | Stop — never trim or alter it; call a fire-door professional |
You need
- Screwdriver to match your hinge screws — usually a Phillips No. 2 (UK: Pozidriv No. 2 fits most door hinge screws) or a flat-blade for older slotted screws. The right size matters: a driver that is too small chews the screw head.
- A helper or two wooden wedges — to take the door’s weight when a hinge comes off.
- Replacement screws, longer than the originals — originals are often short (about 25 mm / 1 in). Keep a few 38–50 mm (1½–2 in) screws of the same gauge (typically No. 8 / 4 mm) for the stripped-hole repair, so the longer screw can bite through into the frame behind the hinge.
- Wooden matchsticks or a sliver of softwood, plus wood glue (PVA) — for the fill-and-re-drill repair.
- A pencil — to mark the sticking point and the gap positions.
- A tape measure or a coin — a 2p coin (UK) is about 2 mm thick, a US quarter about 1.75 mm; door gaps are usually around 2–3 mm, so a coin is a handy rough gauge.
- Only if trimming is truly needed: a sharp hand plane (a block plane or No. 4 smoothing plane), coarse-to-medium sandpaper (80–120 grit) or a sanding block, masking tape, and paint or varnish to seal the trimmed edge.
The hinge-screw check, step by step
Work with the door open, one hinge at a time, starting at the top — the top hinge carries the strain and is the usual culprit.
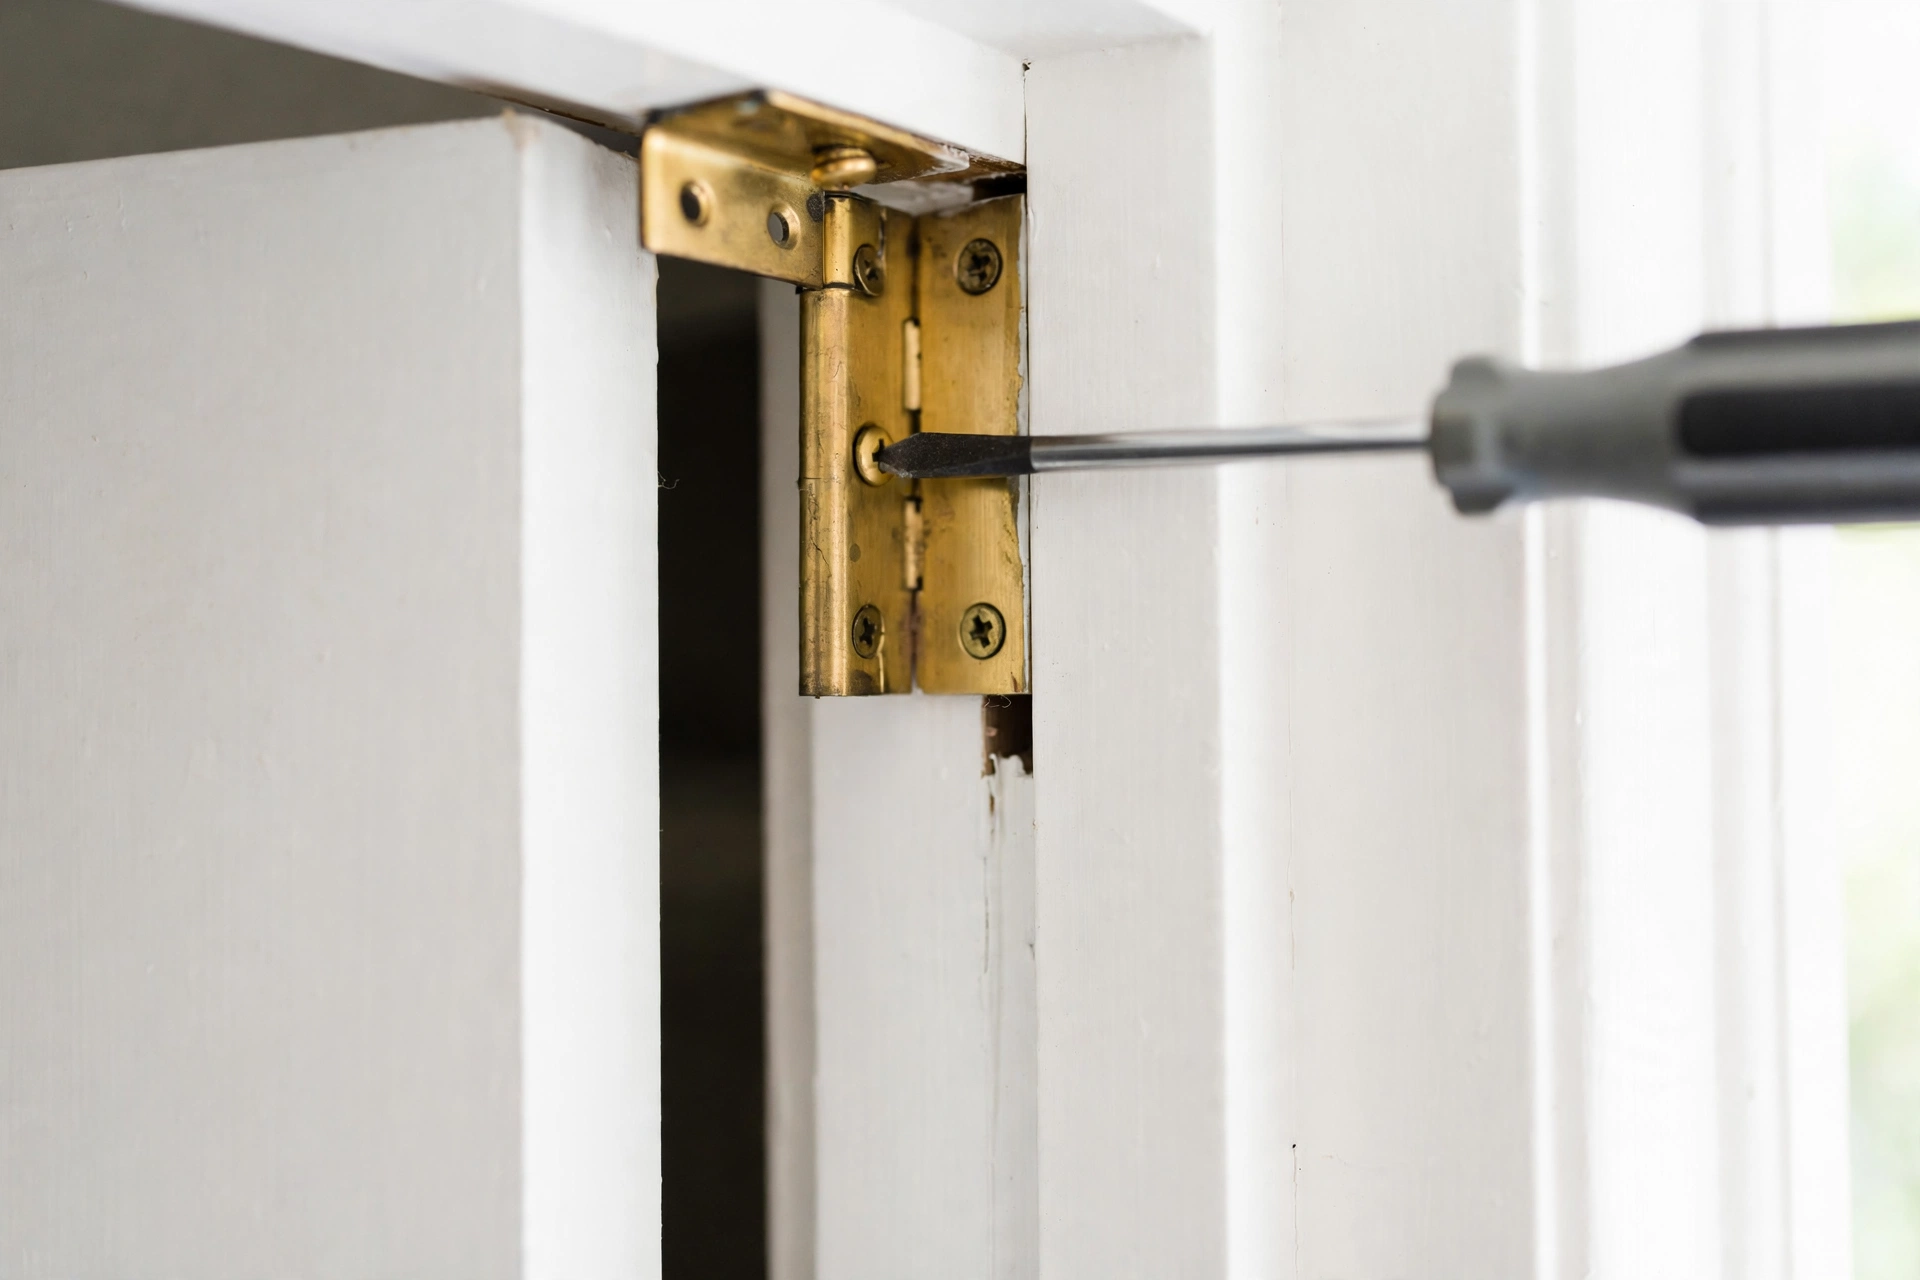
- Try every screw in the top hinge. Put the screwdriver in each screw — both the screws into the door and the screws into the frame — and try to turn it clockwise. A good screw will not move. A loose screw turns and tightens: tighten it firmly, but stop when it seats; over-tightening a good hole can strip it.
- Note any screw that spins without tightening. That hole is stripped — the screw is doing nothing. Leave it for the repair step below; do not keep turning it, which only chews the hole bigger.
- Check the middle and bottom hinges the same way. Bottom-hinge screws matter most when the door drags at the floor. If all screws everywhere are tight, the hinge check has ruled hinges out — go to the even-gap check.
- Check the screws sit flush. A screw head standing proud of the hinge leaf on the hinge side can bind the door against the frame. It should sit in its countersink, flat with the leaf.
- Close the door and test. After tightening, most dropped doors visibly sit higher and the sticking is reduced or gone. Swing it slowly three or four times and feel for any remaining rub.
Repairing a stripped screw hole
Two honest fixes, cheapest first. Both restore grip; neither involves forcing a spinning screw harder.
Fix A — the longer screw (2 minutes, try this first). Remove the spinning screw and replace it with a screw of the same gauge but 38–50 mm long. The original screws are often only about 25 mm, biting into the door edge or the frame lining only. A longer screw reaches through into the solid frame or stud behind, where the wood is sound. Tighten until it seats firmly. In many doors this one screw, at the top hinge, pulls the whole door back up.
Fix B — matchstick and glue (15 minutes plus drying time). If a longer screw still does not grip — the hole itself is chewed up — fill it. Dip two or three wooden matchsticks (heads cut off) or a sliver of softwood in wood glue, push them into the hole until it is packed, and snap or trim them flush. Leave the glue to set — an hour at minimum, overnight is better — then drill a small pilot hole (about 2–2.5 mm) into the filled hole and drive the original screw. The screw cuts its own thread into the packed wood and grips like new. Golf tees and cocktail sticks work the same way; the point is sound wood fibre packed tight, not a brand of filler.
What not to do: do not use wall plugs (rawlplugs) in a hinge hole, do not pack the hole with soft filler alone (it crumbles under a hinge’s load), and do not move the hinge to “fresh wood” — a hinge out of its original recess throws the door’s alignment out everywhere else.
The even-gap check
With the hinges confirmed tight, close the door and read the gap like a map. The gap between door and frame should be roughly even all round — about 2–3 mm at the top and sides.

- Gap wide at the top on the latch side, tight at the bottom corner: the door is still dropping — a hinge is giving somewhere, possibly a worn hinge knuckle rather than its screws. See “if that didn’t fix it”.
- Gap even at the top and hinge side, tight only along the latch edge: the door has swollen or was always a snug fit — this is the one pattern where a minimal trim is the right fix.
- Gap tight at the top and bottom on the latch side but open in the middle: the door or the frame edge has bowed. Small bows can be planed; a badly bowed door is a replacement conversation, not a trimming session.
- Gap tight everywhere: overall swelling or paint build-up. Check for thick, ridged paint layers on the door edge and frame stop first — scraping back a paint ridge is free and sometimes all it takes.
Seasonal swelling — the case for doing (almost) nothing
Timber doors breathe. In a damp autumn and winter they take on moisture and can grow a millimetre or two across their width; in a dry summer they shrink back. If your door sticks from about October to March and swings freely the rest of the year, that is swelling, and the trap is obvious: trim it to fit in winter and it will rattle in its frame all summer, with gaps that let draughts and noise through. The honest options are: live with it if the sticking is mild and the door still closes; make sure the door’s edges are sealed with paint or varnish (unsealed edges drink moisture fastest); and only if the door genuinely will not close in winter, take off the absolute minimum — a millimetre — knowing the summer gap is the price. Never trim a door in its swollen season by the full amount it sticks; trim half of what you think, re-hang, and test.
Trimming — the last resort, done carefully
Only reach this section if the hinges are tight, the holes are sound, the gap check shows a snug latch edge or bottom, and the door sticks in all seasons. And check one more time that it is not a fire door — if it is, stop here and call a professional.
- Mark exactly what comes off. Close the door, find the rubbed patch, and pencil the line to trim on the sticking edge. Take off the minimum: most sticking doors need 1–2 mm, not a centimetre.
- Take the door off its hinges. With a helper holding the door (or wedges under it), remove the hinge screws from the frame side, bottom hinge first, top last, and lift the door away. Lay it on a pair of trestles, saw horses, or a padded workbench, sticking edge up.
- Plane a little at a time. Work the plane along the edge, with the grain where you can, taking thin shavings. A sharp plane set fine beats brute force: check the edge stays straight with a long level or the frame itself as your guide. Stop before you reach your pencil line — you can always take more off, never put it back.
- Ease the edge. A few strokes of 120-grit sandpaper on the trimmed edge and a slight softening of the sharp corners stops the edge catching and gives paint a key.
- Seal the bare wood immediately. Paint, varnish, or seal the trimmed edge before re-hanging if you can — bare timber is where moisture gets in, and an unsealed trimmed edge will swell again next winter. This is the step everyone skips and the reason trimmed doors come back.
- Re-hang and test. Refit the hinges (top hinge screws first, with your helper taking the weight), close the door, and run the even-gap check again. The latch should click without a push, and the door should swing without a rub anywhere.
Common mistakes
- Planing first. The classic error: an hour with a plane to fix what a two-minute screw-tightening would have cured — and now the door is permanently smaller.
- Trimming a swollen door in winter. It fits beautifully until June, then rattles until October. See the seasonal section.
- Forcing a spinning screw. A stripped hole plus more torque equals a bigger stripped hole. Longer screw or packed hole — those are the fixes.
- Trimming a fire door. Never — no exceptions, no “just a shaving”. Fire-door work belongs to a competent professional.
- Taking the door off alone. A solid door is heavy and awkward; dropped, it can tear a hinge out or injure a foot. Helper or wedges, every time.
- Forgetting to seal the trimmed edge. Bare wood swells faster than sealed wood; the sticking returns next damp season.
- Shouldering a stuck door open. You risk your balance and the hinges. Find the rub with the gap check instead.
If that didn’t fix it
Work this path in order. Hinges are tight and holes are sound, but the door still sticks at the top corner: the hinge itself may be worn — the knuckle (the barrel the pin runs through) develops play over years, and the door drops even with tight screws. Open the door, lift the handle end gently, and feel for movement at the hinges; visible play at the top hinge means a replacement hinge of the same size and screw pattern — a like-for-like swap, one hinge at a time, with the door supported. Still sticking after sound hinges, or the gap check showed the door tight everywhere with no swelling pattern: suspect the frame — a frame that has shifted, a loose frame fixing, or a bowed door. Frame and structural questions are where this guide stops: get a carpenter to look, because frame work can involve the wall around it. And if the sticking arrived together with new wall cracks nearby or other doors and windows sticking at the same time, do not treat it as a door problem at all — read our cracks guide’s “professional now” signs and get an assessment of the building, not the door.
When to stop and call a professional
Stop and get help if: the door is a fire door (any alteration at all); the door is badly warped or bowed; the frame is cracked, loose, or has moved; hinge screws strip in the frame itself even with longer screws (the frame timber may be rotten); the sticking appeared suddenly together with new cracks or other doors and windows sticking; or the door is an external door with a multipoint lock that no longer aligns — forcing it can break the locking mechanism, which is a locksmith or door specialist’s job.
Cost table
| Item | Typical cost |
|---|---|
| Hinge-screw check and tightening (DIY) | $0 / £0 |
| Longer screws, pack (DIY stripped-hole fix) | $2–$5 / £2–£4 |
| Matchsticks + wood glue repair (DIY) | $2–$6 / £2–£5 |
| Replacement butt hinge, same size (DIY swap) | $5–$15 / £4–£12 per hinge |
| Hand plane (buy once, if trimming is needed) | $25–$60 / £20–£50 |
| Carpenter to ease and re-hang a door | $75–$200 / £50–£150 per door, typical |
| Fire-door inspection/adjustment by a competent professional | $100–$300 / £75–£250, typical |
US / UK term box
| US term | UK term used in this guide |
|---|---|
| Stripped screw hole | Stripped / blown screw hole |
| Strike plate | Strike plate / keep |
| Door frame jamb | Door lining / frame |
| Sawhorse | Trestle |
| Wall plug / anchor | Rawlplug |
| Fire door (rated door) | Fire door (FD30 / FD60) |
| Door casing / trim | Architrave |
| Wood glue | PVA wood adhesive |
FAQs
Why does my door only stick in winter?
Seasonal swelling. Timber and timber-based doors absorb moisture in damp months and expand slightly, then shrink back in dry weather. If it frees up every summer, do not trim it to its winter size — check the hinge screws, make sure the edges are sealed with paint, and only ever take off the bare minimum if it will not close at all.
Can I fix a stripped hinge screw hole without removing the door?
Usually, yes. Try the longer screw first — it can be fitted with the door in place, one screw at a time, so the hinge never comes off. The matchstick-and-glue repair is also done one screw at a time with the door supported on a wedge, though working with the door off is easier if several screws in one hinge have stripped.
How much can I plane off a door?
As little as possible — 1–2 mm cures most sticking, taken in thin passes with a re-test between. Never plane a fire door at all, and be careful at the top and bottom rails: hollow-core doors have only a limited solid edge (often around 20 mm of trim allowance in total), so check the door maker’s limits before taking more than a few millimetres off a hollow door.
The door sticks and there’s a shiny patch on the frame. What does that tell me?
That patch is where the door rubs — it is the sticking point made visible. A patch at the top corner points to a dropped door (hinges); a patch along the latch edge in winter points to swelling; a patch at the bottom points to a drop or raised flooring. It saves you guessing where to work.
Is a sticking door a sign of something serious?
Usually not — loose hinges and swelling explain the overwhelming majority. It deserves a professional look instead when it arrives suddenly, together with new wall cracks, or when several doors and windows start sticking at the same time. That combination is a building question, not a door question.
Checklist
- [ ] Sticking point found (rubbed patch / slow close test)
- [ ] Sticking pattern noted — all year, or damp months only
- [ ] Confirmed the door is NOT a fire door before any trimming was considered
- [ ] Top hinge screws checked first, then middle and bottom
- [ ] Any spinning screw repaired — longer screw, or matchstick-and-glue with a pilot hole
- [ ] Even-gap check done all round the closed door
- [ ] Seasonal swelling ruled in or out before trimming
- [ ] If trimmed: minimum taken off, edge sanded, bare wood sealed, door re-hung and re-tested
- [ ] Sudden sticking + new cracks or multiple doors sticking → professional assessment, not DIY
Keep reading
- Door Won’t Latch, Swings by Itself, or Rattles? The Hinge and Latch Alignment Guide
- Crack in Your Wall? How to Monitor It — and the Signs That Mean Call a Professional
- Cold Air Coming Under Your Door? Find the Gap Before You Buy Any Draught Strip
- Doors & Walls pillar — every symptom in this cluster, diagnosed