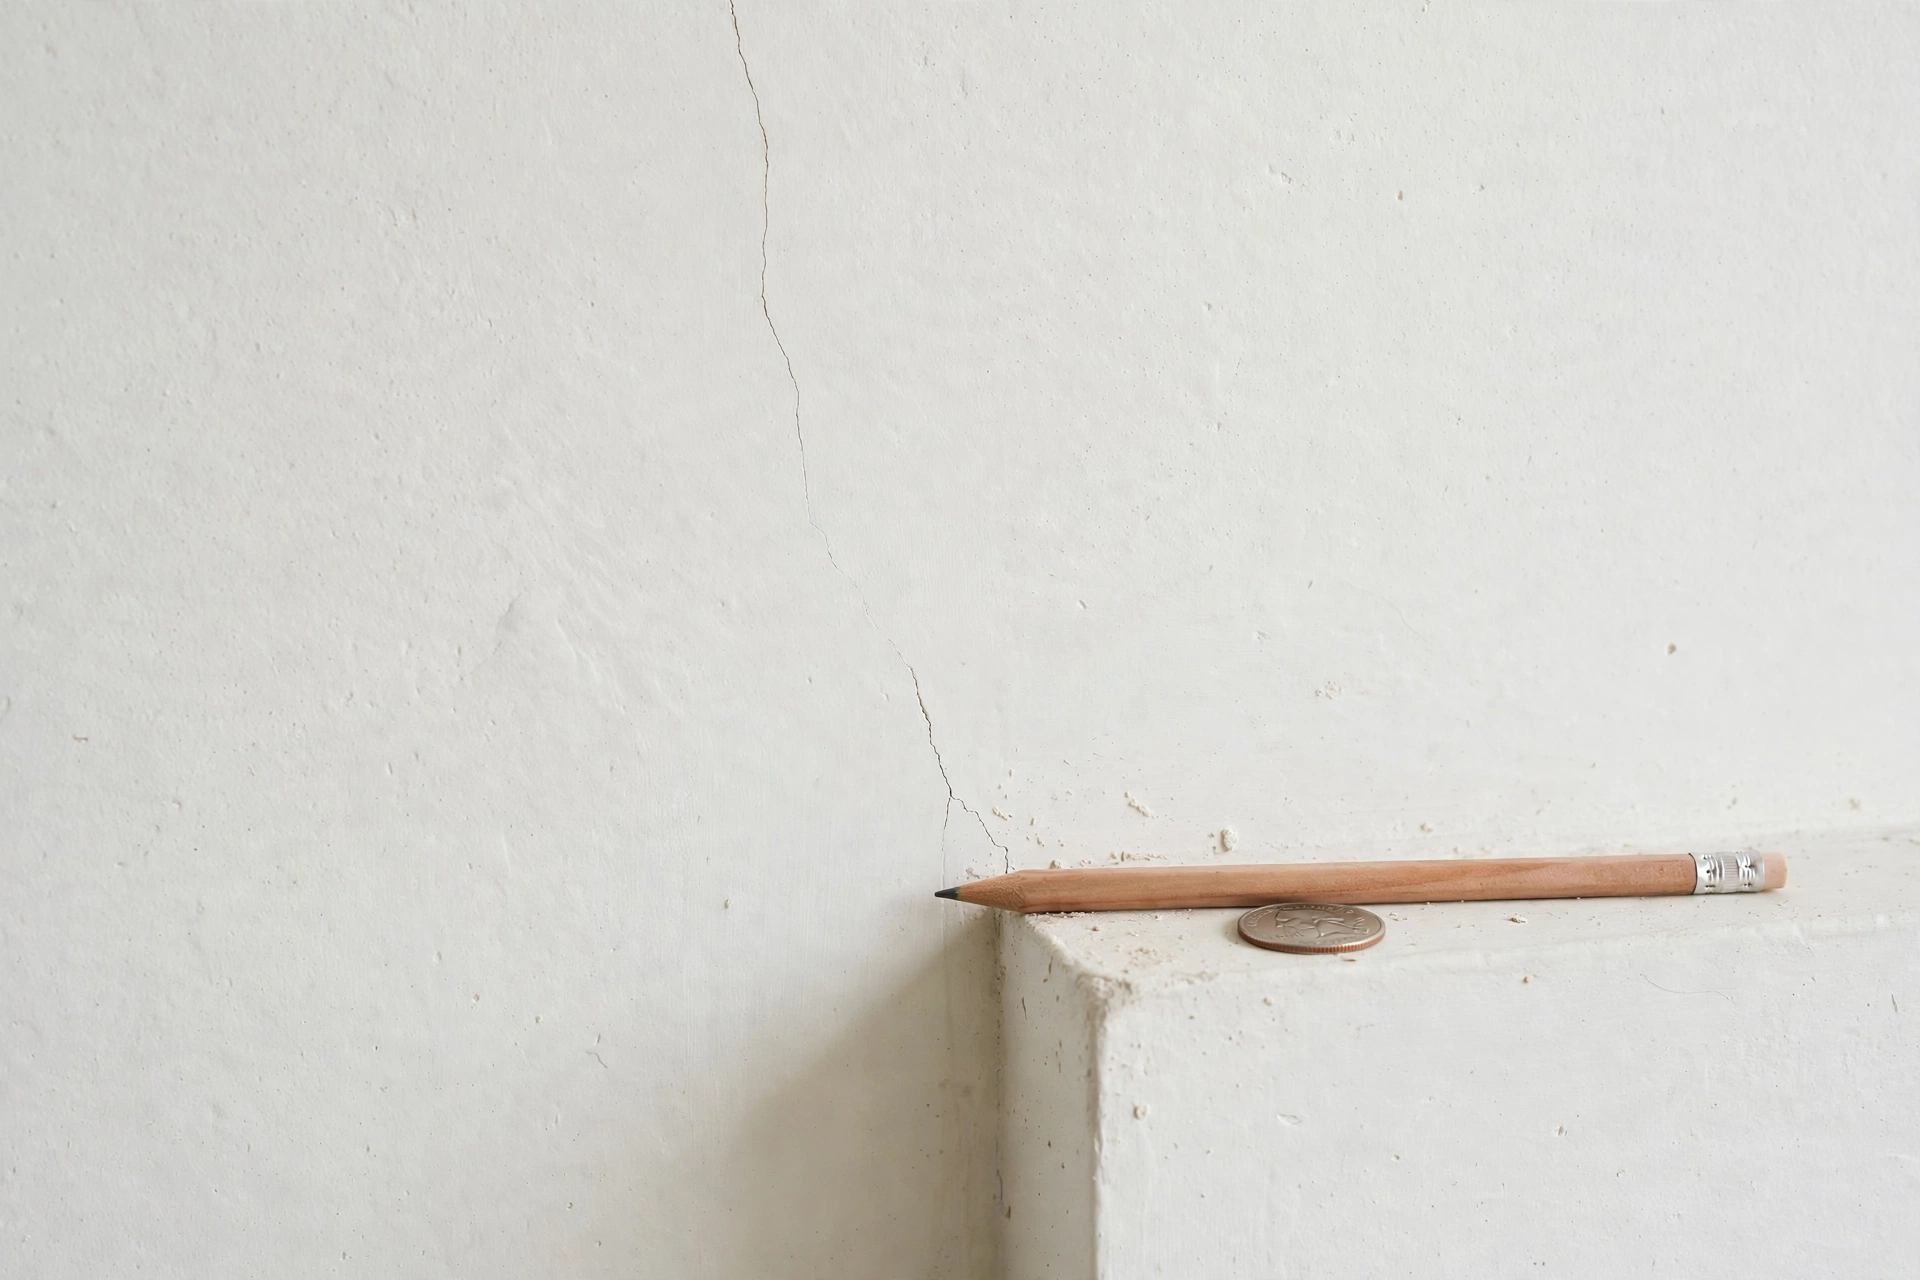
Crack in Your Wall? How to Monitor It — and the Signs That Mean Call a Professional
By the FaultToFix team | Published: 31 October 2026 | Last updated: 31 October 2026
DIY level: Monitoring only — no repair skills needed · Cost: £0 to monitor (a pencil and a coin); filler only for a proven-stable hairline, £5–£10 · Time: 10 minutes to set up; 2 minutes a month to check
Quick Answer: Do not guess at a crack, and do not let anyone guess for you — measure it and watch it. Note its width in millimetres, its shape, and where it is; mark both ends with a pencil line and today’s date; photograph it from the same spot with a coin for scale; then check it monthly. A crack that does not change over months of monitoring is behaving very differently from one that grows, widens, steps diagonally, or arrives together with sticking doors and windows — and those changing signs mean stop monitoring and call a professional. This guide will not tell you what caused your crack, because no honest guide can do that from a description. It will teach you to describe and record a crack so well that you — and any professional you call — know exactly what it is doing.
Key Takeaways
- Describe, don’t diagnose: width in millimetres, shape, location, and direction are facts you can record; a cause is a judgement only an inspection can make.
- Movement is the key question: a crack that changes over time needs a professional; the monitoring method in this guide is how you find out whether yours changes.
- Marks and dates beat memory: pencil lines at both ends, dated photographs from the same spot with a coin for scale — that record is the evidence.
- Some signs skip the monitoring stage entirely: wide, stepped or diagonal, growing fast, or appearing with sticking doors/windows or damp, soft plaster — professional now.
- Never fill a moving crack: filler hides the evidence and simply cracks again. Filling is only for a hairline crack that has proven stable over months of monitoring.
- Renters: report cracks to your landlord in writing, with your dated photographs attached — do not fill a crack in a home you rent.
Jump to a Section
- How to describe a crack · Signs that mean professional now · Observation → action table · You need · The monitoring method, step by step · Keeping the record · What to tell and show a professional · Renters: report it in writing · Filling — only for a proven-stable hairline · Common mistakes · If your crack changes · Cost table · US / UK term box · FAQs · Checklist
Safety box
This guide is about watching a crack, not repairing a building — and the limits matter. Never dig into a crack, chip plaster away to “see how deep it goes”, or chase a crack along a wall: you can damage the wall and you will destroy the very evidence monitoring depends on. Never fill, paint over, or cover a crack that is changing, wide, stepped, or damp, and never fill a crack in a rented home — report it instead. If a wall is bulging, leaning, or its plaster is soft and crumbling, or if floors slope noticeably, do not monitor and wait: get a professional assessment promptly. And if a crack appears suddenly after an event — a nearby excavation, a fallen tree, a burst pipe, a storm — skip the monitoring setup and go straight to the professional section of this guide.
How to describe a crack (the four facts that matter)
When people describe cracks, they usually describe their worry (“it’s huge”, “it appeared from nowhere”). Professionals need facts instead. These four are recordable by anyone, in ten minutes, with no special tools:
1. Width — in millimetres, at its widest point. Measure across the crack at its widest place and write the number down: “about 1 mm”, “about 3 mm”. A ruler or tape held across it is accurate enough; the edge of a coin helps too (a UK 1p or 2p coin is about 1.5–2 mm thick at the rim; a US dime is about 1.35 mm). As a rough visual scale only: hairline cracks are under 1 mm, about the width of a credit card’s edge or less. Width on its own still does not tell you a cause — it is one fact of four, and it is change in width that matters most.
2. Shape and direction. Is it a single straight line, a jagged vertical or horizontal run, a diagonal, or a stepped pattern that zig-zags (in brick or block walls, stepped cracks follow the mortar joints in a stair pattern)? Does it taper — wide at one end, vanishing at the other? Sketch it or photograph it; shape is hard to describe in words and easy to show.
3. Location. Which wall, which room, inside or outside (or both sides of the same wall)? Near a door or window corner, at a ceiling junction, or mid-wall? Does it appear in the same place on the other side of the wall? Location and mirroring are facts a professional will ask about first.
4. Company it keeps. Note anything that arrived with it: doors or windows nearby sticking or newly free, other cracks in the same room or the room above or below, damp patches, soft or bulging plaster, sloping floors. One crack on its own and a crack with company are recorded differently — and the company is often what decides whether monitoring is appropriate at all.
Write all four down with the date. That single dated note is already more useful than a month of worrying, and it is the start of the monitoring record below.
Signs that mean professional now (skip the monitoring)
Monitoring is for cracks that are small, dry, and not changing as far as you can tell. Do not set up a monitoring routine — go straight to a professional assessment — if any of these is true:
- The crack is growing or widening — it has visibly changed over days or weeks, or it has already grown past a mark or repair from before.
- It is wide — you can fit the edge of a ruler or a fingertip into it, roughly 5 mm or more at its widest, or it is wide enough to see through the pattern changing along its length.
- It is stepped or diagonal, especially running from the corner of a door or window opening, or it runs through bricks or blocks rather than only through plaster or mortar.
- It appears on both sides of the same wall, or matching cracks are appearing in more than one room.
- Doors or windows nearby have started sticking, or stopped sticking, at the same time — or a door that used to latch no longer does. (Our sticking-door and latch guides cover ordinary hinge causes — but a crack arriving together with those symptoms is company, and company changes the advice.)
- The plaster around it is damp, soft, bulging, or crumbling, or the wall itself looks out of line.
- It appeared suddenly, over days rather than months, or after building work, excavation, tree removal, a leak, or a storm nearby.
- You can see daylight through it, or it is in a chimney breast or a wall that supports something heavy above it.
A professional assessment for signs like these usually means a surveyor or a structural engineer — someone whose job is the building, not the decorating. The record-keeping in this guide still helps: even a “professional now” crack benefits from dated photographs taken before the visit.
Observation → action table
This table deliberately does not name causes — it matches what you can observe to the right next step: monitor properly, or stop monitoring and call a professional.
| What you notice | What it is NOT safe to assume | Your next step |
|---|---|---|
| Hairline (under ~1 mm), dry, first noticed, no other changes | That it is harmless — you do not know yet whether it moves | Set up monitoring: marks, measure, photograph |
| Hairline, unchanged across months of dated records, including a season change | That it will never change — only that it is stable so far | May be filled under the strict conditions in this guide; keep checking the spot |
| Crack growing past an end mark, or width rising between checks | That more watching will settle it | Professional assessment — stop monitoring |
| Stepped or diagonal shape, especially from a door/window corner | That it is a plaster-only blemish | Professional assessment |
| Wide (roughly 5 mm or more), daylight visible, or through both sides of the wall | That filler is a repair | Professional assessment, promptly |
| Crack plus a nearby door or window newly sticking (or newly free) | That they are two separate small jobs | Professional assessment — the combination is the sign |
| Damp, soft, bulging, or crumbling plaster around the crack | That it is a crack problem at all | Professional — moisture and wall condition first |
| Sudden appearance after nearby works, a leak, tree removal, or a storm | That a monitoring season is the right first move | Professional assessment now |
You need
- A pencil — for the end marks and dates on the wall itself (pencil, not pen: it does not bleed through paint and can be painted over later).
- A ruler or tape measure — to measure width in millimetres at the widest point.
- A coin — taped or held beside the crack in photographs as a permanent scale reference (a 2p or 1p in the UK; a dime or quarter in the US).
- A phone or camera — for dated photographs from the same spot each time.
- A notebook or a notes app — the monitoring log: dates, widths, and anything else that changed.
- Optional: a crack width gauge — an inexpensive card or plastic gauge printed with graded lines (typically £5–£12 / $6–$15) that you hold across the crack to read its width precisely. Useful if you will be monitoring for months; not essential.
- Only for the final filling stage, if reached: a small tub of interior filler, a filling knife, and fine sandpaper — see the filling section for the strict conditions.
The monitoring method, step by step
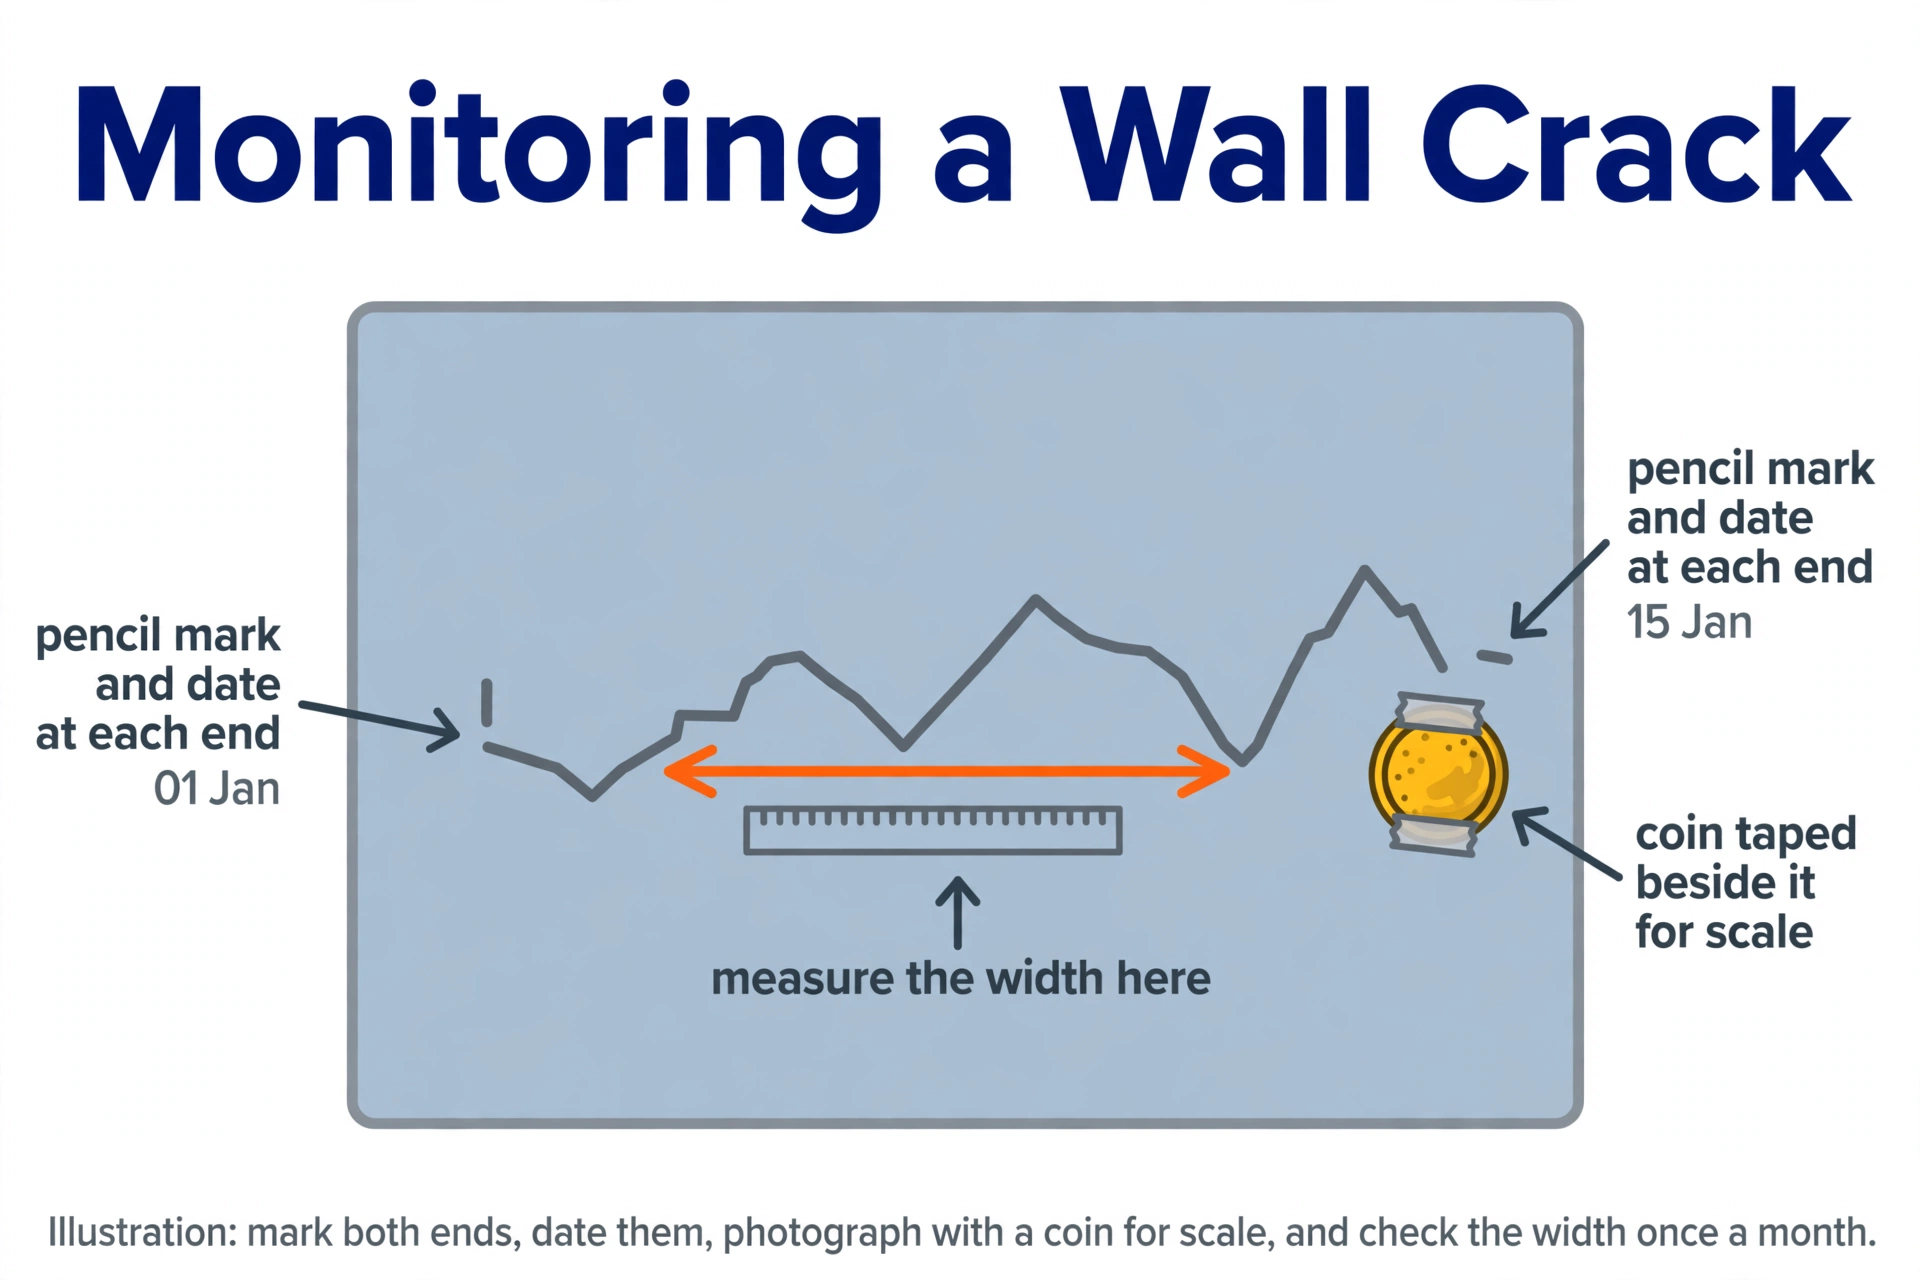
- Record the description first. Width at the widest point, shape, location, and company, with today’s date — the four facts from the section above.
- Mark both ends. Draw a short pencil line across the crack at right angles, right at each tip of the crack, and write the date beside each line on the wall (small, in pencil). If the crack extends past either mark later, it is growing in length — you will be able to see it, not wonder about it.
- Mark a width checkpoint. At the crack’s widest point, draw two tiny pencil ticks, one on each side of the crack, and note the measured width beside them with the date. On later checks, growth shows as the crack spilling past a tick or the measured number rising.
- Photograph it properly. Take one close photograph with the coin held or taped beside the crack for scale, and one wider photograph showing where on the wall it is. Always photograph from the same spot and distance at each check, so the pictures are comparable.
- Start the log. One line per check: date, width at the checkpoint, whether the ends have passed their marks, anything else noticed (new cracks, sticking doors, damp). The log lives with the photographs.
- Check monthly. Same day-ish each month, two minutes: look at the end marks, measure the checkpoint width, take the same two photographs, add the log line. Monthly is frequent enough to catch change and infrequent enough that you actually keep it up.
- Run it for a season, not a week. Movement, when it happens, is often slow and sometimes seasonal. A crack that has been measured, unchanged, across several months — including a change of season — has earned the description “stable so far”. A fortnight of no change proves very little, and this guide does not treat it as proof.
Keeping the record
The record is the product of this guide, so keep it like it matters: photographs in one album or folder, in date order; the log in one place, not scattered across sticky notes; and the original description at the top. If you ever call a professional, sell the house, or report to a landlord, this folder is what turns “there’s a crack, it might be getting worse” into a dated, measured history — which is the single most useful thing a homeowner can hand over. Do not paint over your pencil marks during the monitoring period; if the wall must be decorated, re-mark and re-photograph immediately after, and note the re-marking date in the log so the chain is not broken.
What to tell and show a professional
When you call, lead with the record, not the worry. Say: when you first noticed the crack; its width at the widest point and whether that has changed, with dates; its shape and location; whether it is on one side of the wall or both; and what arrived with it (sticking doors, other cracks, damp). Show the dated photographs in order, coin scale visible, and the log. Ask what they recommend recording next, and whether they want to inspect inside, outside, or both. A professional who is shown months of stable measurements can say something useful quickly; one shown a freshly filled crack cannot — which is why the next sections exist.
Renters: report it in writing
If you rent, a crack is information for your landlord, not a repair for you. Report it in writing (email is fine — it is dated), describe the four facts, attach your dated photographs, and keep a copy. Do not fill, paint over, or cover a crack in a rented home: you could be hiding a problem the landlord is responsible for assessing, and you may be blamed for concealing it. If the crack has any of the “professional now” signs — wide, growing, stepped, with sticking doors or damp — say so plainly in the message and ask for an inspection; follow up in writing if nothing happens. Start the monitoring record anyway: your dated notes protect everyone, including you.
Filling — only for a proven-stable hairline
Filling is covered in this guide under strict conditions, and only at the end of the process, where it belongs. Fill a crack yourself only if all of these are true: it is a hairline crack (under about 1 mm); it is in plaster, not running through brick or block; it has been monitored with marks, measurements and photographs and has not changed at all across several months, including a change of season; it is dry, with sound plaster around it; and none of the “professional now” signs has ever applied to it. If any condition is missing, do not fill — keep monitoring or call a professional.
Never fill a moving crack. Filler in a crack that is still changing simply cracks again, usually within weeks — and worse, it erases the crack’s edges and your marks, destroying the record a professional would need. Filling is the last step of a stable crack’s story, never a way to stop thinking about a live one.
If — and only if — your crack qualifies: rake out loose dust from the hairline with the edge of the filling knife (do not widen it), dampen the crack lightly, press interior filler in with the knife slightly overfilled, let it dry fully per the tub’s instructions, sand flush with fine sandpaper, and paint. Then keep the log: add a “filled on [date]” line, photograph the repair, and check the spot at your next two monthly checks. If the crack reappears through the repair, that is new information — it was not stable after all — and the answer is a professional assessment, not more filler.
Common mistakes
- Asking “what caused it?” of a photograph or a description. Nobody can answer that honestly without inspecting the building. Anyone who does — in either direction, alarm or reassurance — is guessing.
- Filling first and monitoring never. The most common and most costly mistake: it hides the evidence and the crack reappears anyway.
- Marking only one end. Cracks can grow from either tip; unmarked ends grow unnoticed.
- Photographs with no scale and no fixed spot. An unscaled close-up could be any crack anywhere; the coin and the same vantage point are what make photographs evidence.
- Checking daily for a week, then never again. Daily checks show nothing and burn out your attention; monthly checks over a season are the method.
- Painting over the marks. The record breaks. Re-mark and note it the same day if decorating cannot wait.
- Assuming a crack near a sticking door is two separate small jobs. Together, they are company — and company is one of the “professional now” signs.
If your crack changes (this guide’s “if that didn’t fix it” path)
Treat change as the method working, not failing: the marks did their job. Photograph the change the day you notice it, add a dated log line describing exactly what changed (past the end mark by how much, width up from X mm to Y mm), and move to the professional section — do not “watch it a bit longer” once growth, widening, stepping, or company has appeared. Keep the whole record together for the visit. And do not fill or cover the crack while you wait for the appointment: the professional needs to see it exactly as it is.
Cost table
| Item | Typical cost |
|---|---|
| Monitoring setup — pencil, ruler, coin, phone photos (DIY) | $0 / £0 |
| Crack width gauge card (optional) | $6–$15 / £5–£12 |
| Interior filler + filling knife (only for a proven-stable hairline) | $6–$14 / £5–£10 |
| Surveyor / structural engineer assessment visit | $250–$600 / £200–£500, typical, varies by area and report type |
| Professional crack repair after assessment | Quoted per cause and scope — never guess a figure before assessment |
US / UK term box
| US term | UK term used in this guide |
|---|---|
| Drywall | Plasterboard |
| Spackle / joint compound | Filler |
| Structural engineer | Structural engineer (same) |
| Home inspector | Surveyor (building survey) |
| Hairline crack | Hairline crack (same) |
| Mortar joint | Mortar joint / pointing |
| Tenant | Tenant / renter |
FAQs
Can you tell me what caused my crack from a photo?
No — and be wary of anyone who will. A photograph can show width, shape, and location, and those are worth recording carefully. A cause needs an inspection of the building: its walls inside and out, what is above and below, and how the crack behaves over time. That is why this guide teaches monitoring and description instead of diagnosis.
How long should I monitor before I can relax about a crack?
A crack earns confidence slowly. Unchanged marks, measurements, and photographs across several months — including a change of season — justify calling it stable so far, and a stable hairline may then be filled under the conditions in this guide. If it changes at any point, the answer is a professional assessment, not more monitoring.
My crack is only 1 mm wide. Surely that is nothing?
Width is one fact of four, and on its own it decides nothing. A narrow crack that is lengthening, stepping, or arriving with sticking doors deserves a professional look; a narrow crack that sits unchanged through a season of monitoring is a different story. Measure it, mark it, and let its behaviour — not its width alone — decide.
Should I fill a hairline crack straight away to stop it getting worse?
No. Filler does not stop a crack moving; it only covers it, and in a moving crack it cracks again while hiding the evidence. Monitor first. Filling has one place in this guide: the end of the process, for a hairline crack that has proven stable over months.
I rent my home. The crack is worrying me but my landlord is slow to respond. What can I do?
Report it in writing with the four facts and dated, scaled photographs, and keep copies. Say plainly if any “professional now” sign applies, and ask for an inspection. Keep your monitoring log going — dated records are the strongest thing a tenant can hold, and they help the landlord’s professional too.
Checklist
- Four facts recorded with the date: width (mm), shape, location, company
- Both ends marked in pencil, with dates beside the marks
- Width checkpoint marked and measured at the widest point
- Photographs taken — close-up with a coin for scale, plus a wider location shot
- Log started; monthly checks in the diary
- “Professional now” signs checked — none present, or professional already called
- Nothing dug out, chased, or widened; marks not painted over
- Renters: landlord informed in writing, photographs attached, copy kept
- Filling only if hairline, plaster-only, dry, and proven unchanged over months including a season change