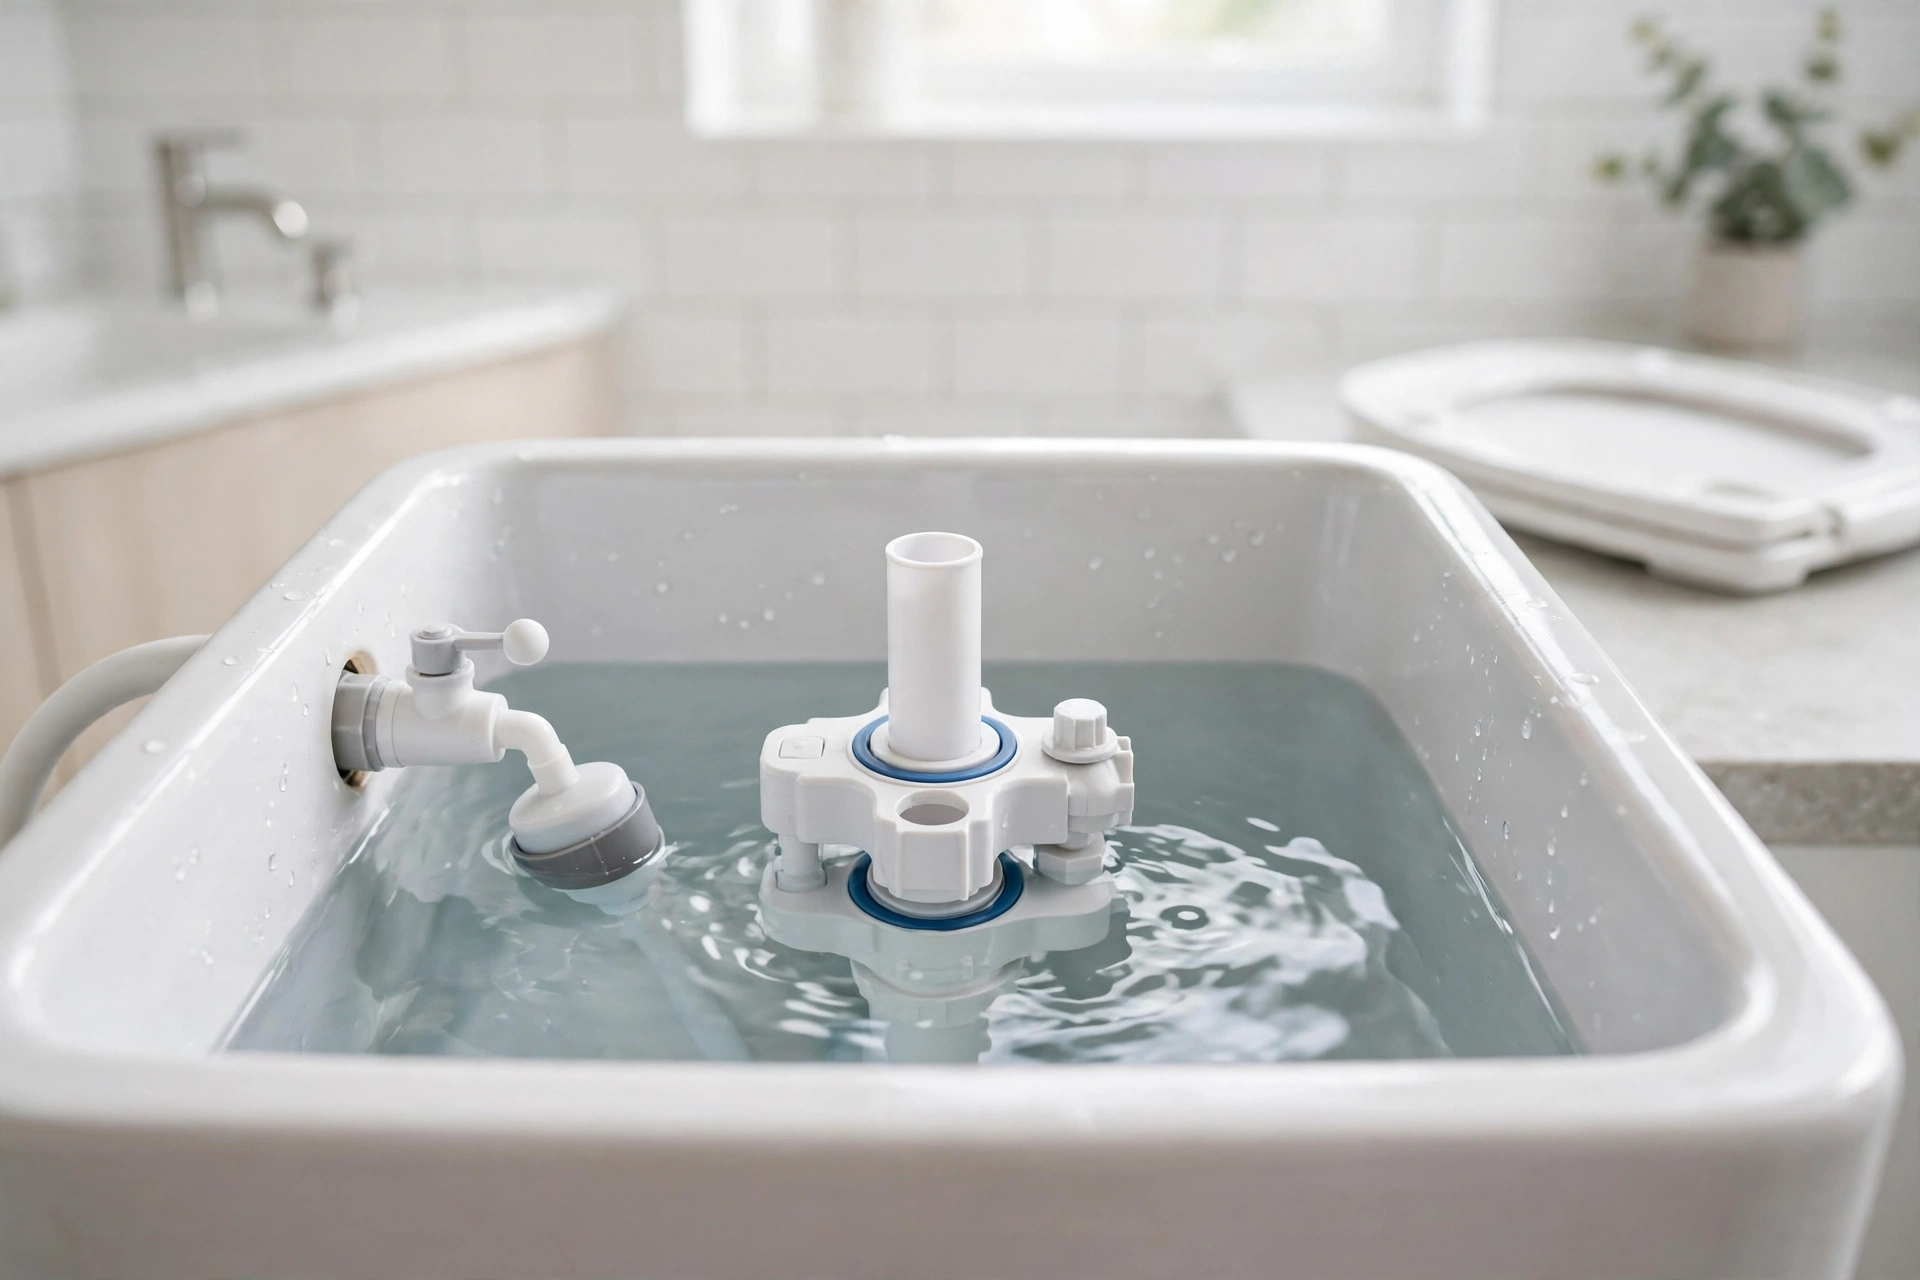
By the FaultToFix team | Published: 26 October 2026 | Last updated: 26 October 2026
DIY level: Easy · Cost: £0 to test, £3–£10 to fix · Time: 5 minutes to test, 20–30 minutes to fix
Quick Answer: A constant trickle of water running down the back of the toilet pan is almost always the drop valve’s seal washer — the flat rubber ring at the bottom of the dual-flush valve. It perishes, warps, or gets coated in limescale, so cistern water seeps past it day and night. A 5-minute tissue test (below) confirms it before you spend anything. A new seal costs about £3–£10 and fits by hand, no tools beyond a sponge and bucket.
Key Takeaways
- Constant trickle into the pan, 24 hours a day = drop-valve seal leak. The tissue test proves it in 5 minutes.
- Rule out the overflow first: the water level should sit roughly 25 mm (1 inch) below the internal overflow. A level at or over that mark means a fill-valve fault, not a seal fault.
- Match the seal to your valve brand and model. A seal that is 2 mm out will trickle exactly like the old one.
- Clean the seat glass-smooth before fitting the new seal — a brand-new seal on a crusty seat still leaks.
- A missing, seized, or weeping isolation valve is a stop condition, not a challenge — and cistern removal, soil pipe work, and supply pipework all go to a pro.
Jump to a Section
Confirm the diagnosis · Symptom → cause table · What you need · The fix, step by step · If that didn’t fix it · If it’s the fill valve instead · Common mistakes · When to stop and call a pro · Cost table · US / UK term box · FAQs · Checklist
Safety box
Everything in this guide happens inside the cistern, with the water turned off at the toilet’s own isolation valve (usually a small slotted screw on the pipe below the cistern — a quarter-turn with a flat screwdriver) before the valve comes out. You never unbolt the cistern from the pan, touch the soil pipe, or cut into any pipe. If the isolation valve is missing, seized, or weeps when you turn it — stop there and use the mains stopcock instead, or call a plumber. And if water is on the floor rather than trickling inside the pan, this is the wrong guide — see “When to stop and call a pro”.
First, confirm the diagnosis (the tissue test and the dye check)
Don’t buy parts yet. Two checks, in order:
Check 1 — the tissue test (5 minutes). Dry the back wall of the pan thoroughly with toilet tissue. Flush, wait until the cistern has refilled and gone quiet, then press a fresh sheet of tissue against the back of the pan, under the rim, and leave it for a few minutes. If the tissue comes away wet in a streak from water you can’t quite see moving, cistern water is leaking into the pan — continue below. Bone dry = the trickle is coming from somewhere else (check the symptom table).
Check 2 — the dye check (optional, settles arguments). Add a few drops of food colouring to the cistern water and do not flush. If coloured water appears in the pan within 15–30 minutes, the leak is confirmed past the flush valve seal — the same test as our US phantom-flush guide, on UK hardware.
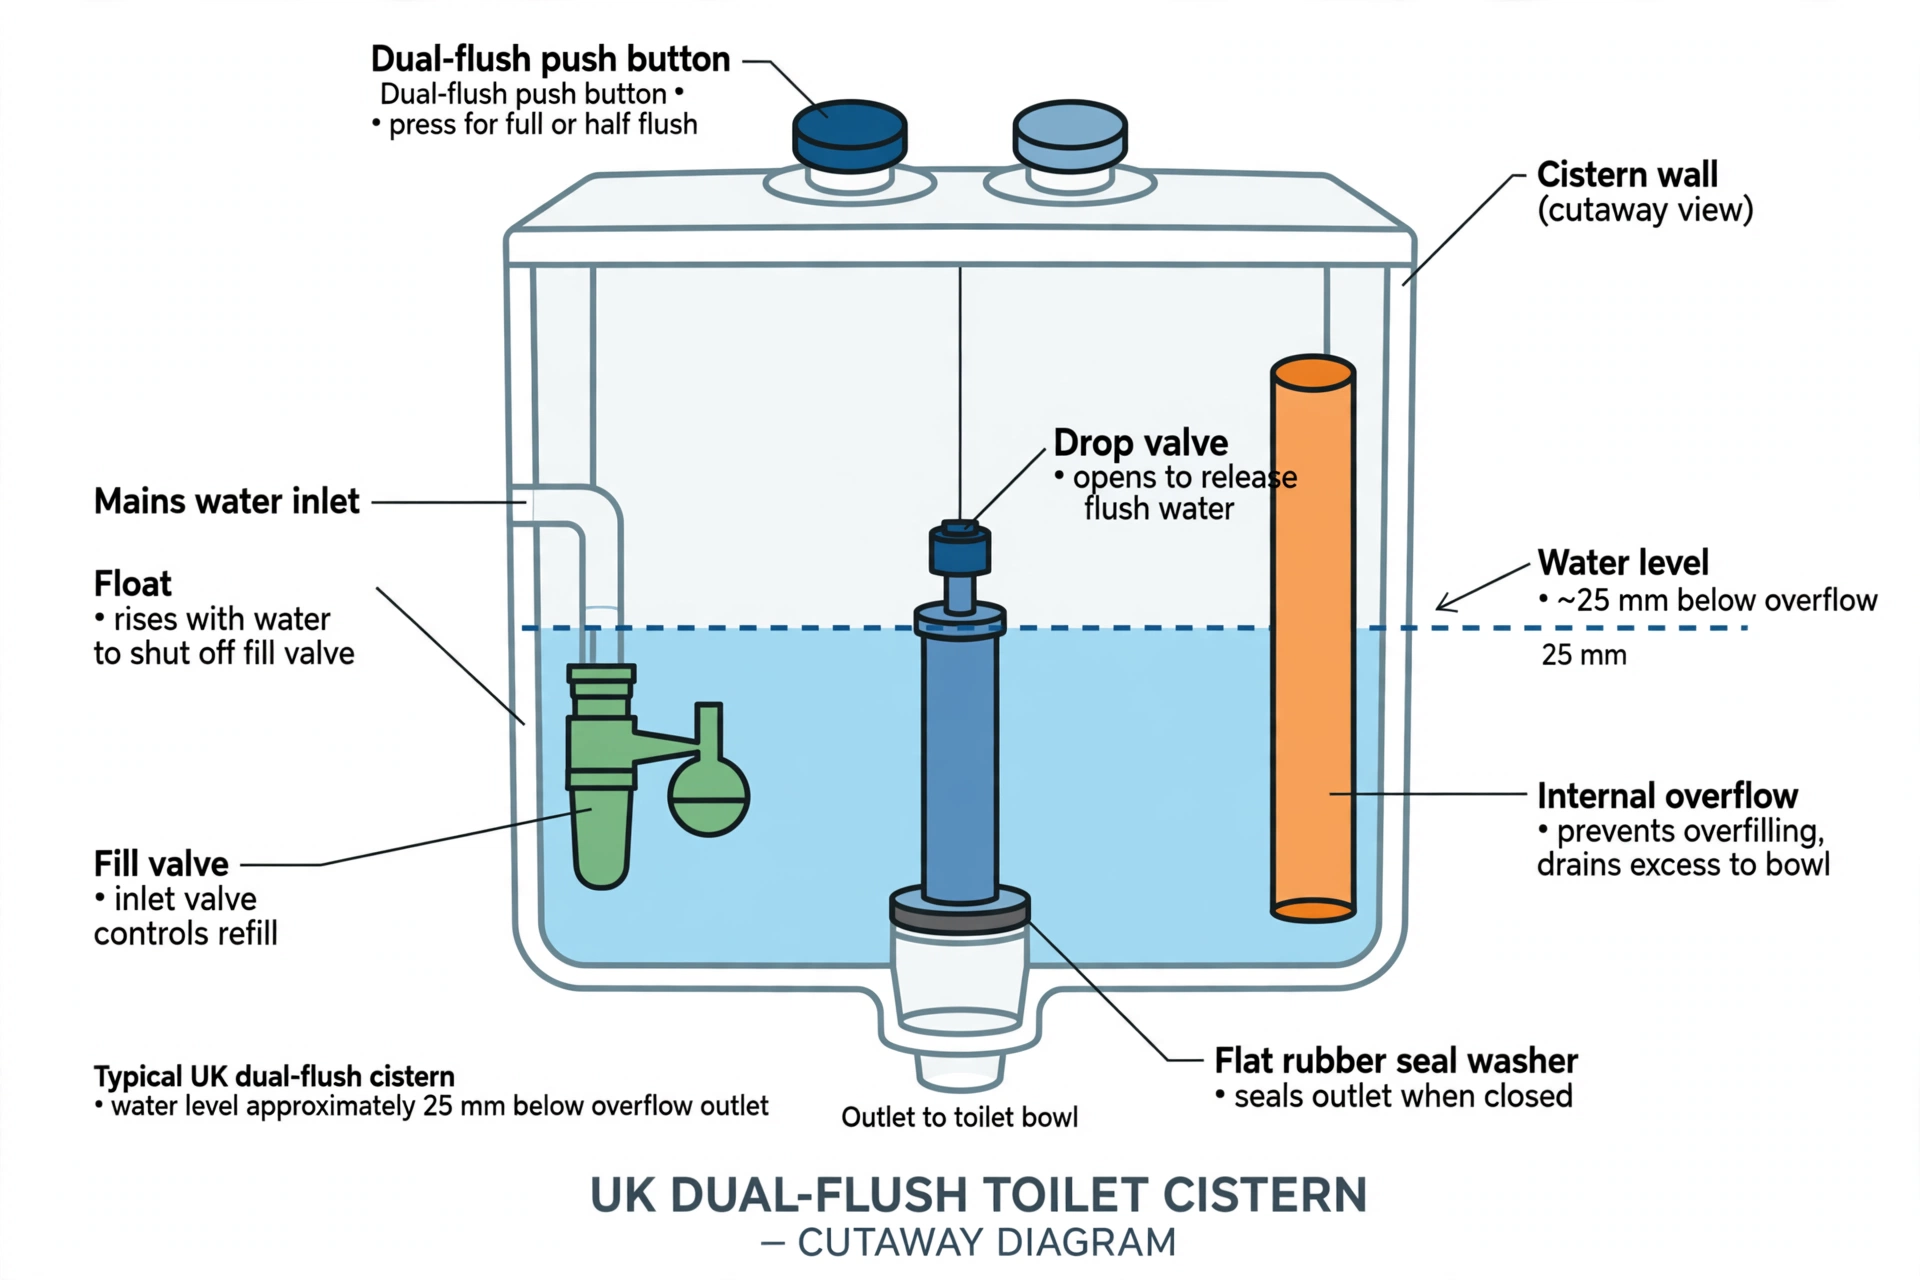
Before blaming the seal, rule out the overflow: modern UK cisterns overflow internally — a fill valve set too high, or one that isn’t shutting off, sends water down through the flush valve and into the pan by design. Look inside the cistern: the water level should sit at the marked line on the valve or cistern wall, roughly 25 mm (1 inch) below the top of the internal overflow. If the level is at or over that point, your problem is the fill valve, not the seal — skip to “If it’s the fill valve instead”. A level that is correct, with a trickle that never stops, is the seal.
Symptom → cause table
| What you notice | Most likely cause | First check |
|---|---|---|
| Constant faint trickle down the back of the pan, 24 hours a day; cistern refills briefly every so often | Perished drop-valve seal — water seeping past the washer at the valve base | Tissue test — wet streak confirms it |
| Trickle that starts right after a flush and slowly eases, then returns | Seal not seating cleanly — limescale or grit on the seat, or the valve not dropping straight | Remove the valve, wipe the seat and seal (fix steps 3–4) |
| Water running into the pan in a visible stream, cistern level dropping fast | Valve stuck partly open, or the seal has split/folded | Look inside: valve visibly lifted or the seal deformed |
| Leak at the joint between cistern and pan — drips underneath after flushing, dry in between | Close-coupled washer (the big foam/rubber doughnut between cistern and pan) — a different leak, not covered by the seal fix | Dry tissue held under the joint while flushing; this needs the cistern lifted off — see the pro box unless you’re confident |
| Drips on the floor or supply pipe, cistern dry inside the pan | Inlet/fill valve connection or a perished fibre washer on the supply | Dry-hand check around the inlet connection underneath |
| Trickle into the pan and the level is up to the overflow mark | Fill valve overfilling or not shutting off — the internal overflow doing its job | Waterline check first (above) |
You need
- Replacement drop-valve seal washer — match it to your valve: most UK dual-flush valves (Fluidmaster, Wirquin, Grohe, Thomas Dudley and similar) use a flat silicone or rubber seal that is brand- and model-specific in size. Take the old seal to the shop, or photograph the valve and order by model — a seal that is 2 mm out will trickle exactly like the old one.
- A sponge and a bucket or jug — for the last of the cistern water.
- Toilet tissue / food colouring — for the tests, ~£0.
- Optional: a cloth for wiping the seat, and a little descaler on a cloth if limescale is heavy (never pour strong chemicals into the cistern — they attack the new seal too).
The fix, step by step
- Isolate the water at the toilet’s isolation valve (quarter-turn) and flush to empty the cistern. Hold the flush until it stops, then sponge out what remains into the bucket.
- Remove the drop valve. On most modern UK dual-flush valves the whole valve body twists anti-clockwise and lifts out of its cradle at the cistern base (some unclip instead — if it won’t twist with gentle hand pressure, check the maker’s method rather than forcing it; the cistern lid or a sticker often names the brand). The seal is the flat washer at the very bottom of the valve.
- Inspect the seal. Peel it off its groove. If it’s stiff, wavy at the edges, split, or slimy and degraded, it’s done — that’s your leak. If it looks perfect, the problem may just be what was under it.
- Clean the seat. Run a finger and the cloth around the seat the seal lands on, down in the cradle. Limescale ridges and grit are the other half of this fault — a brand-new seal on a crusty seat still leaks. Wipe until it feels glass-smooth.
- Fit the new seal (or the cleaned old one, if it was genuinely only dirt) flat into its groove, all the way round, no twists. A twisted seal leaks on day one.
- Refit the valve — twist/clip it back into the cradle until it seats firmly and stands straight. A valve sitting slightly crooked drops its seal onto the seat unevenly.
- Turn the water back on, let the cistern fill to the marked line, and flush twice. Then repeat the tissue test after 10–15 minutes: dry tissue = fixed. For certainty, do the dye check overnight.
If that didn’t fix it
- The valve itself is worn. If a correct, clean seal on a clean seat still trickles, the valve body or its closing mechanism is worn — replacement valves are roughly £10–£25, they fit the same cradle on many brands (check compatibility), and the swap is the same twist-out, twist-in with the water isolated. Still a homeowner job; no pipework changes.
- It’s the close-coupled washer, not the seal. A leak that appears under the cistern–pan joint only when you flush is the big doughnut washer between cistern and pan. That means unbolting and lifting the cistern — doable, but heavy, fragile porcelain and a two-person lift; see the pro box if you’re not confident.
- It was the fill valve all along. If the tissue test is dry but the waterline sits at the overflow, work through the section below.
If it’s the fill valve instead
Two homeowner-safe fixes, in order:
- Adjust the level. Most modern fill valves adjust with a screw, dial, or sliding clip on the valve body — set the level to the marked line, roughly 25 mm below the internal overflow, flush, and let it refill to check.
- Replace the valve (moderate, still DIY-able). A universal bottom-entry fill valve is roughly £8–£20. Water isolated and cistern emptied, undo the supply connection and mounting nut from underneath (towel ready for the cup of water that always escapes), fit the new valve, reconnect, set the height, turn the water on slowly and check the underside joint with a dry hand. If the supply is a rigid copper pipe rather than a flexible connector, or anything is corroded solid, this stops being a beginner job — see below.
Common mistakes
- Buying a seal before the tissue test. A trickle with the waterline at the overflow is a fill-valve fault, not a seal fault — the test, not a guess, names the part.
- Fitting a new seal on a crusty seat. Limescale ridges and grit under the seal defeat a perfect new washer; wipe the seat glass-smooth first.
- Fitting a twisted seal, or the wrong size. A seal twisted in its groove leaks on day one, and a seal 2 mm out leaks exactly like the old one — match it to the valve brand and model.
- Forcing a valve that won’t twist out. If it won’t move with gentle hand pressure, check the maker’s method instead — forced plastic cracks, and a cracked valve is a bigger job.
- Forcing a seized isolation valve. If it will not turn, or weeps when touched, stop: that is the one step in this job that can flood a room.
- Pouring strong chemicals into the cistern. Descaler belongs on a cloth for the seat, never poured into the cistern — harsh chemicals attack the new seal too.
- Treating a joint leak as a seal leak. Drips under the cistern–pan joint need the cistern lifted, not a new seal — that is a different job, and a two-person lift.
When to stop and call a pro
- The isolation valve is missing, seized, or leaks when turned, and there’s no other easy shut-off.
- The leak is at the cistern-to-pan joint and you’re not confident lifting the cistern (porcelain cracks if it’s dropped or overtightened).
- Water on the floor from the base of the pan, a rocking toilet, or a sewage smell — that’s the pan connector/soil side, a different and bigger job.
- Any supply fitting is rigid, corroded, or won’t move without force.
- The trickle survives a new seal and a new flush valve — something less common is going on and a plumber’s diagnosis beats a third part; a UK plumber for a cistern-repair visit typically runs roughly £60–£120 depending on region, orientation only.
- You’re a renter: the tissue test and waterline check cost nothing and move nothing — do them freely, and tell your landlord the result (“constant trickle into the pan; tissue test shows the drop-valve seal leaks”). A seal swap is reversible and takes half an hour, but in most tenancies cistern repairs are the landlord’s cost anyway. Don’t lift the cistern off the pan or touch supply connections as a renter.
Cost table
| Item | Cost | Time |
|---|---|---|
| Tissue test + waterline check | £0 | 5 minutes |
| Replacement drop-valve seal | £3–£10 | 20–30 minutes to fit |
| Replacement drop valve (if the valve itself is worn) | £10–£25 | — |
| Universal bottom-entry fill valve (if the fill valve was the fault) | £8–£20 | — |
| Plumber’s cistern-repair visit (UK, orientation only) | £60–£120 | — |
US / UK term box
Reading from the US? Same fault, different hardware: US toilets are usually a tank (= cistern) with a flapper instead of a drop valve — the phantom-flush version of this leak, with the same dye test, is covered in our US guide, “Toilet Keeps Running Every Few Minutes?” (/toilet-keeps-running-phantom-flush/). Other pairs for this article: tap = faucet, food colouring = food coloring, isolation valve = shut-off valve, pan = bowl. The tissue test works on both — US readers can use it on flapper toilets too.
FAQs
How much water does a cistern leaking into the pan actually waste?
More than it looks. The trickle runs 24 hours a day, and even a slow seep adds up to a meaningful volume over a month — on a water meter that’s real money for a £5 seal. It’s also why the cistern refills briefly by itself: the level drops past the seal leak until the fill valve tops it up, the same cycling sound as the US phantom flush.
How long should a drop-valve seal last?
Typically a few years — roughly 3–5 is a common expectation, less in hard-water areas where limescale builds on the seal and seat, and less again if harsh in-cistern bleach blocks are used (they attack the rubber). If your seal feels stiff, wavy, or slimy when it comes out, it was due — and wiping the seat clean at the same time is what makes the new one last.
Can I just flip the seal over and refit it?
Sometimes raised as a get-you-home trick, and a clean, still-flexible seal reseated the other way up may seal for a while — but if the rubber has perished or warped, flipping it only delays the same trickle by days or weeks. A seal is a few pounds; do the test again a week later if you try it, and treat a repeat trickle as the answer.
My toilet has a pneumatic or cable flush, not buttons on top — same fix?
Yes, the flush trigger (button, cable, or air tube) is separate from the valve that seals the cistern. Whatever lifts the drop valve, the water is held back by the same base seal, diagnosed and replaced the same way. If the trigger itself is broken — buttons stuck down or a snapped cable — that’s a different fault with a different part.
The trickle stopped after cleaning but came back in a fortnight — why?
Almost always limescale rebuilding on the seat, or a seal that was already perished and only sealed while it was disturbed and wet. In a hard-water area, descale the seat properly at the second attempt and fit a new seal rather than cleaning the old one twice — two returns of the same trickle is the pattern that says the seal itself, not the dirt, was the fault.
Checklist
- ☐ Tissue test: pan back wall dried, fresh tissue checked after refill — wet streak or bone dry?
- ☐ Dye check (optional): colour in the pan within 15–30 minutes without flushing?
- ☐ Waterline check: level ~25 mm below the internal overflow mark
- ☐ Water isolated at the toilet’s isolation valve — and it turns freely
- ☐ Drop valve twisted/clipped out without forcing; brand/method noted
- ☐ Old seal inspected — stiff, wavy, split, or slimy means replace
- ☐ Seat wiped glass-smooth before the new seal goes in
- ☐ New seal fitted flat in its groove, no twists, correct size for the valve
- ☐ Valve refitted firmly and standing straight
- ☐ Water back on, cistern filled to the marked line, flushed twice
- ☐ Repeat tissue test after 10–15 minutes dry; dye check overnight for certainty